Step 2: Configure Your ConnectWise HubSpot Data Sync
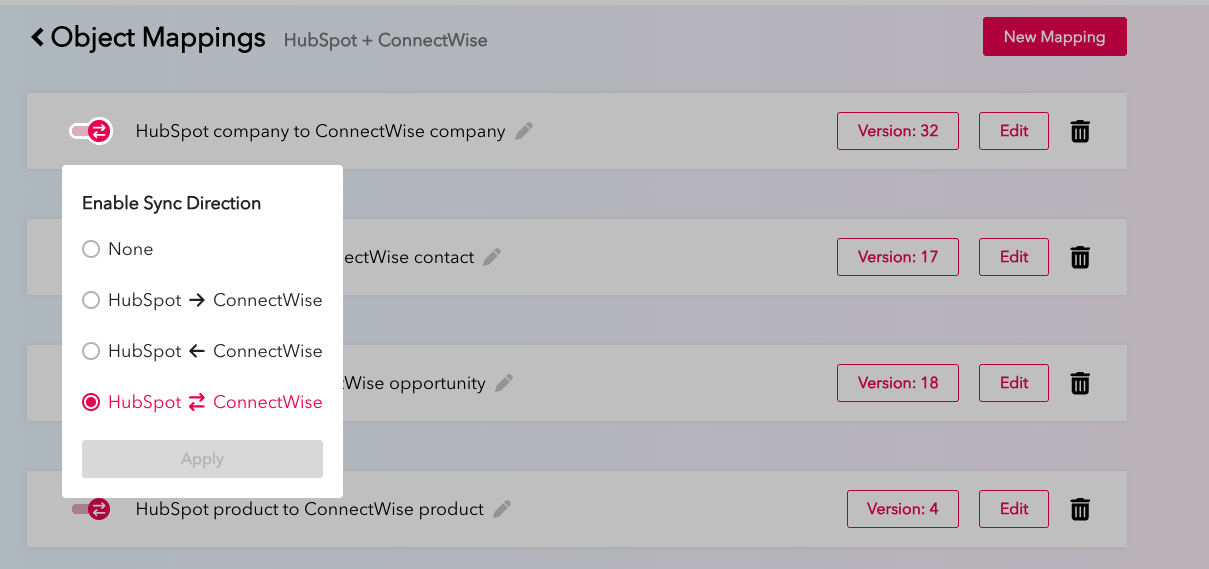
This is where you make it yours. In our easy-to-use visual interface, you'll see all your object mappings laid out in clean rows. Each row shows the mapping name, sync direction arrows, version history, and edit options.
Adding new object mappings is simple. Click "New Mapping" in the top right corner. Select your objects (for example, you may want to sync ConnectWise Opportunities to HubSpot Deals). The system suggests logical field mappings automatically, but you have complete control.

Direction control is just a click. See those arrow toggles next to each mapping? Click to choose:
- One-way from HubSpot to ConnectWise
- One-way from ConnectWise to HubSpot
- Bidirectional sync for real-time updates everywhere
Field mapping gets granular. Click edit on any object mapping, and you're in the field mapping interface. Here you can:
- Add new fields from dropdown menus (first name, last name, company, custom fields - they're all there)
- Delete fields you don't need syncing
- Change sync direction at the field level
- If a field doesn't exist in HubSpot, SyncSmart will auto-create it

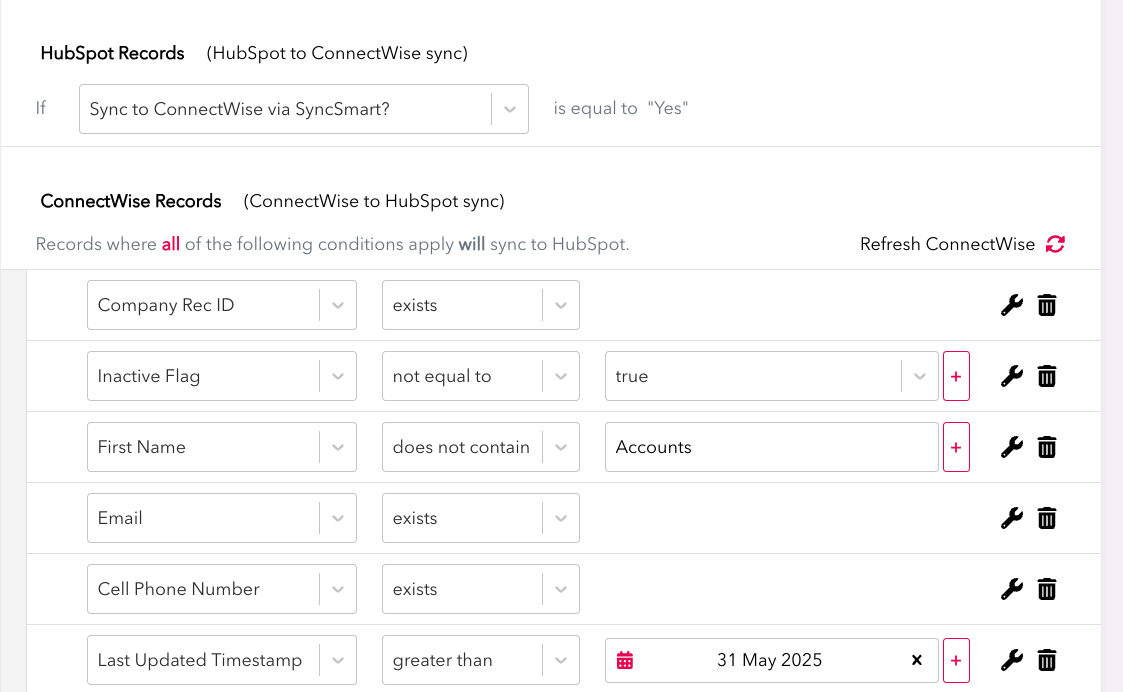
Filters let you sync exactly what you need. Maybe you only want ConnectWise contacts from the enterprise segment. Or only opportunities above $50K. Or tickets created after a specific date. Set these filters right in the interface using dropdown fields and simple operators: no query languages, no complex syntax.
Navigate Your ConnectWise HubSpot User Interface
Once you're in the SyncSmart app, you're in control. The interface is built for real business users, not developers. Here's a deeper look at some of the features of the interface:
The Logger gives you complete visibility. Navigate to Logs in the top nav, and you'll see your sync dashboard. Every sync action is tracked with:
- Status indicators (success, error, warning)
- Source and target systems
- Record types and names
- Exact record IDs
- Detailed messages explaining what happened

Need to troubleshoot? Apply filters to find specific sync statuses. Looking for failed contact syncs from yesterday? A few simple clicks. Want to see only successful opportunity updates? Done. You can even customize which columns display to match your workflow.
Version control saves your sanity. Every object mapping tracks its version history. See that version number on the right side of each mapping? Click it to view:
- Every change made to that mapping
- Who made each change
- Exactly when changes happened
- The ability to revert to any previous version instantly
Made a field mapping mistake that broke something? Revert. Want to see what your predecessor changed six months ago? It's all there.

Support is built right in. Hit a snag? Click "Support" in the top navigation to create a ticket without leaving the app. The more details you provide about what you're trying to sync, the faster our team can help.
Account management is simple. Your Account info shows your current subscription, usage levels, and billing details. Scale up or down based on your sync volume. No surprise overages, no hidden fees.